- Adding Printer to Mac
- Adding Printer to Windows
- Releasing your Job
- How to Print
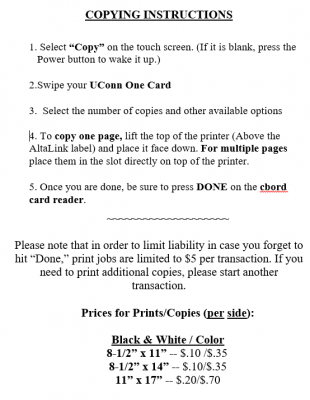
- How to Copy
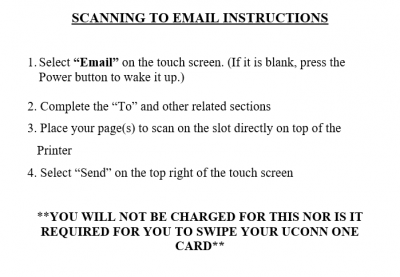
- How to Scan to Email
- Problems or Issues
Adding Printer to Mac
Mac OS users should follow these instructions to add the Study Area and Resource Center public printer as an option
- Make sure you are connected to "UCONN-SECURE" for wireless
- Download and Install Xerox AltaLink C8035 print drivers
- Run the Xerox Print Driver .pkg install

4. In the step to select a printer, first click the "IP address or DNS" button to the right of the screen. You should now see the option to input the printer's IP address.
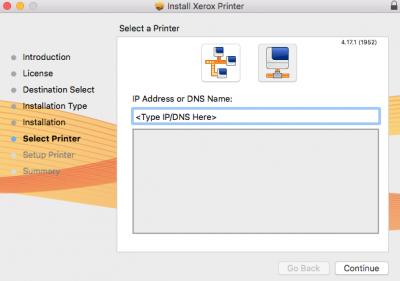
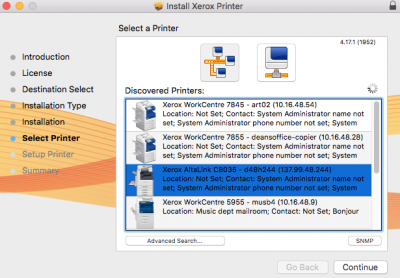
5. Enter the IP address for the printer you need: the IP address for the Study Area and Resource Center is 10.16.48.33 . The installer will recognize the printer and you can select "Continue."
6. You can de-select the options to 'Set Printer as Default' and 'Print Test Page'

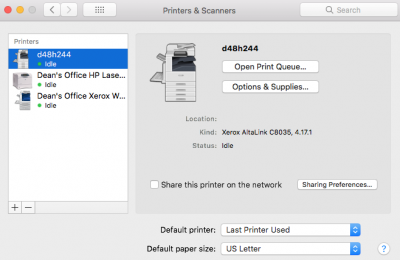
7. Once you have successfully installed the printer it will appear in Printers & Scanners
Once you have added the printer as an option you can send jobs to it.
See the section "Releasing your job"
Adding Printer to Windows
Windows users should follow these instructions to add the Study Area and Resource Center public printer as an option
- Make sure you are connected to "UCONN-SECURE" for wireless
- Download and Extract Xerox Global Print Driver PCL 6
- Open up Printers and Scanners by searching for Printers in the Start Menu.
4. Click Add Printer and click "The printer that I want isn't listed"

5. Click the "Add a printer using a TCP/IP address or hostname" option and enter this IP address: 10.16.48.33 for the printer in the Study Area and Resource Center
6. Name the printer.
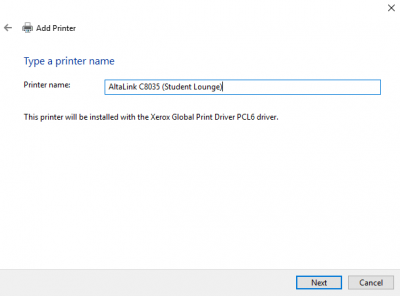
7. Select "Do not Share". (Others will not be able to use the printer without following these instructions)
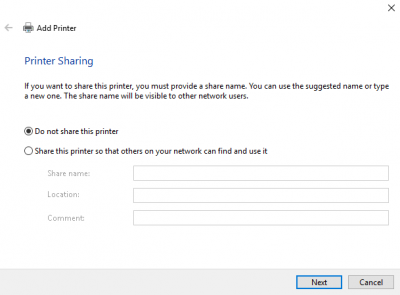
8. Done

Once you have added the printer as an option you can send jobs to it.
See the section on "Releasing your job"
Releasing your Job
Once you have added the public printer as an option to your Mac or Windows machine you can send jobs to it.
- Swipe your Uconn ID on the gray cbord card reader.
- At the Xerox AltaLink touchscreen, check the 'Job' menu. (If the machine has a blank screen, press the Power Button to wake it up)
- Find the job that you submitted (Will begin with your NetID).
- From the pop-up menu for each job select 'Print'
- Once you are done with your printing be sure to press DONE on the card reader.
How to Print

How to Copy
How to Scan to Email
Problems or Issues
If there are any issues or you are having trouble printing please call: 860-486-3016